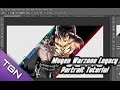
Hey guys, I am back with a new Mugen Tutorial! This time I will show you have to create and install your own character portrait for Noz's Warzone Legacy ScreenPack. You will need either Photoshop or any other Pain program in order to follow this tutorial. Then you will need Mugen Ultimate Fighter Factor 3 and Noz's Legacy ScreenPack Templates.
ScreenPack and Templates:
http://mugenguild.com/forum/topics/nozs-legacy-custom-portrait-thread-153362.0.html
Fighter Factory 3.0:
http://mugenguild.com/forum/topics/fighter-factory-3-0-final-release-preview-v2-137126.0.html
Note: If you followed the steps and your portrait comes out distorted or glitchy, then that means you will have to go back into fighter factory and delete that entire portrait and re-add that sprite in its proper Group, Index number. So in translation if the sprite already had a 9000,0 etc. before you placed you over write with your own portrait. You must first delete that sprite entirely first by hitting the X button on the sprite tab to delete and then hit add new sprite and insert yours with its Group, Index numbers.
I don't know why it does that, but it solved my problem when I ran across it. If your Fighter Factory crashes when you discovered the portrait errors and tried to re-write. Delete the character entirely and re-put the character in Fighter Factory, and do the process in the paragraph above. Its all trial and error, if you still have problems even after I explained in video and in this description then you must figure out what you have done wrong, because the rest is beyond my control.
----------------------------------------------------------------------------------------------------
Facebook: http://www.facebook.com/brian.blackson.14?ref=tn_tnmn
Twitter: https://twitter.com/MugenLord